Arduino as ISP to change the bootloader and burn sketches
How to change Arduino Nanos bootloader. Optiboot for Arduino Nano. Arduino as ISP.
This Article is based on the Arduino IDE version 1.6.8. The workflow may change in later versions.
Why
Why you may want to change or remove the bootloader. Optiboot has a no wait mod which executes the program right away without waiting for serial input. However, pressing the Arduinos resetbutton or resetting via USB still lets you upload sketches via USB. Optiboot is a smaller bootloader than the default one, leaving more space for the sketch. Some Arduino clones from BangGood don't ship with a bootloader, so you have to upload one yourself.
Arduino as ISP
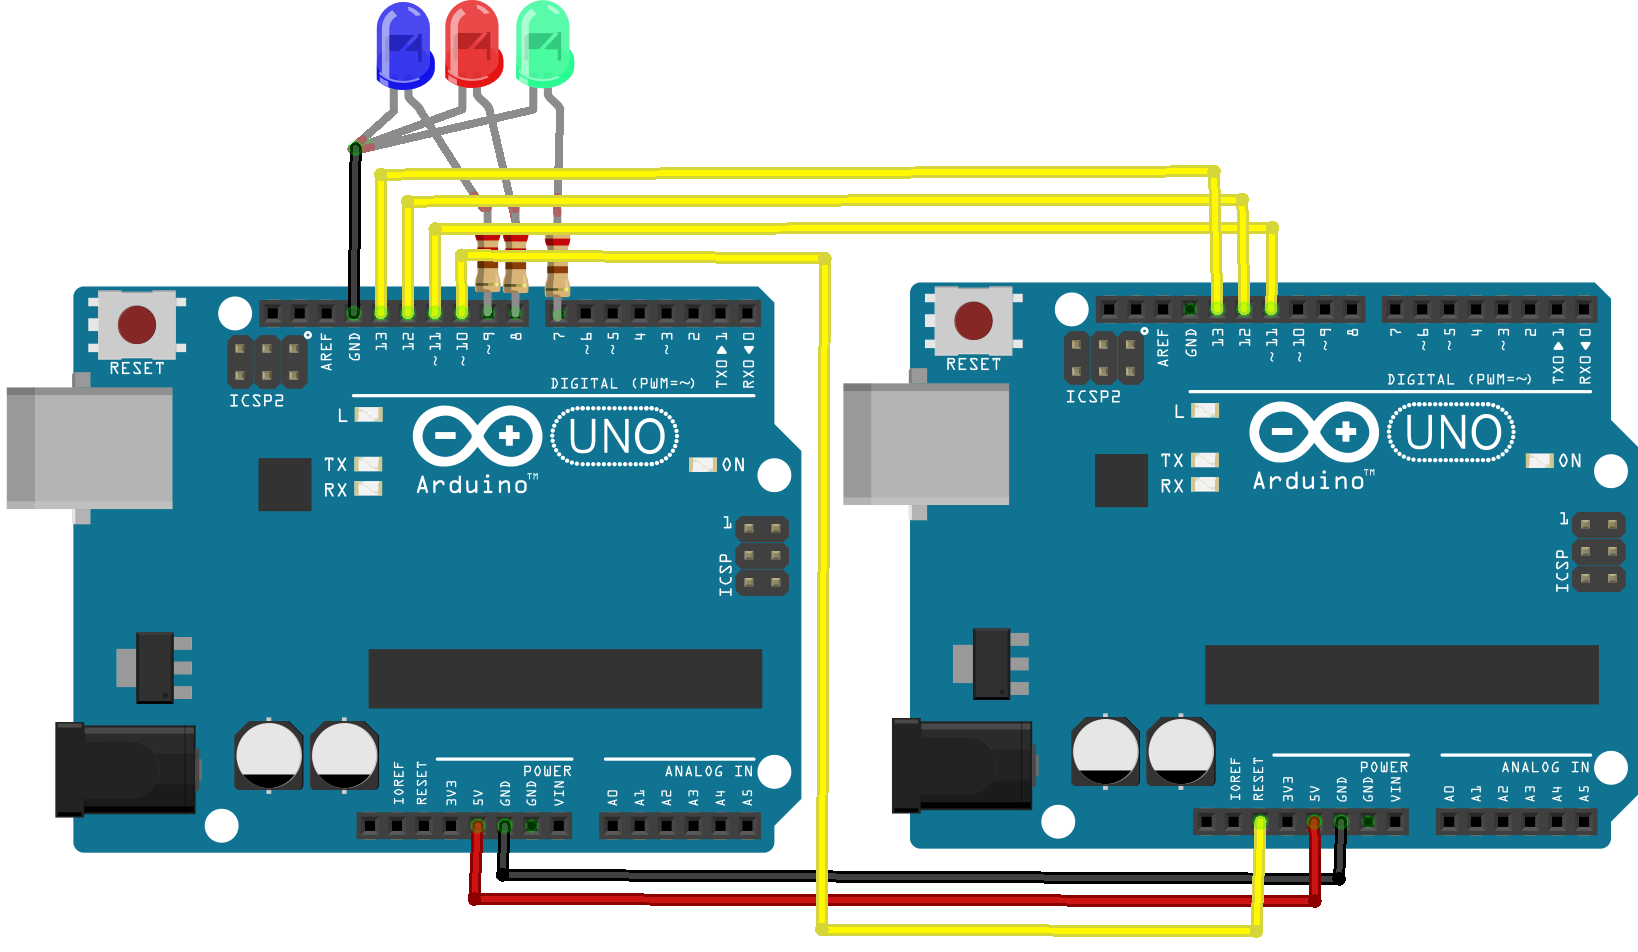
To change or remove Arduinos bootloader and upload/burn sketches to an Arduino without bootloader, an ISP in system programmer is needed. Either a dedicated ISP or a second Arduino can be used. To use an Arduino as ISP, first connect it to your computer as usual. Select File->Examples->11.ArduinoISP->ArduinoISP and upload the sketch. The Arduino is now programmed to act as programmer for other Arduinos. To see if the Arduino ISP is ready to be used, it is sensible to to connect a resistor and a led to pin 7, pin 8 and pin 9.
// 9: Heartbeat - shows the programmer is running
// 8: Error - Lights up if something goes wrong (use red if that makes sense)
// 7: Programming - In communication with the slave
The led on pin 9 pulses when the programmer is ready. If it does not pulse, try pressing its reset button.
Connect the to be programmed Arduino
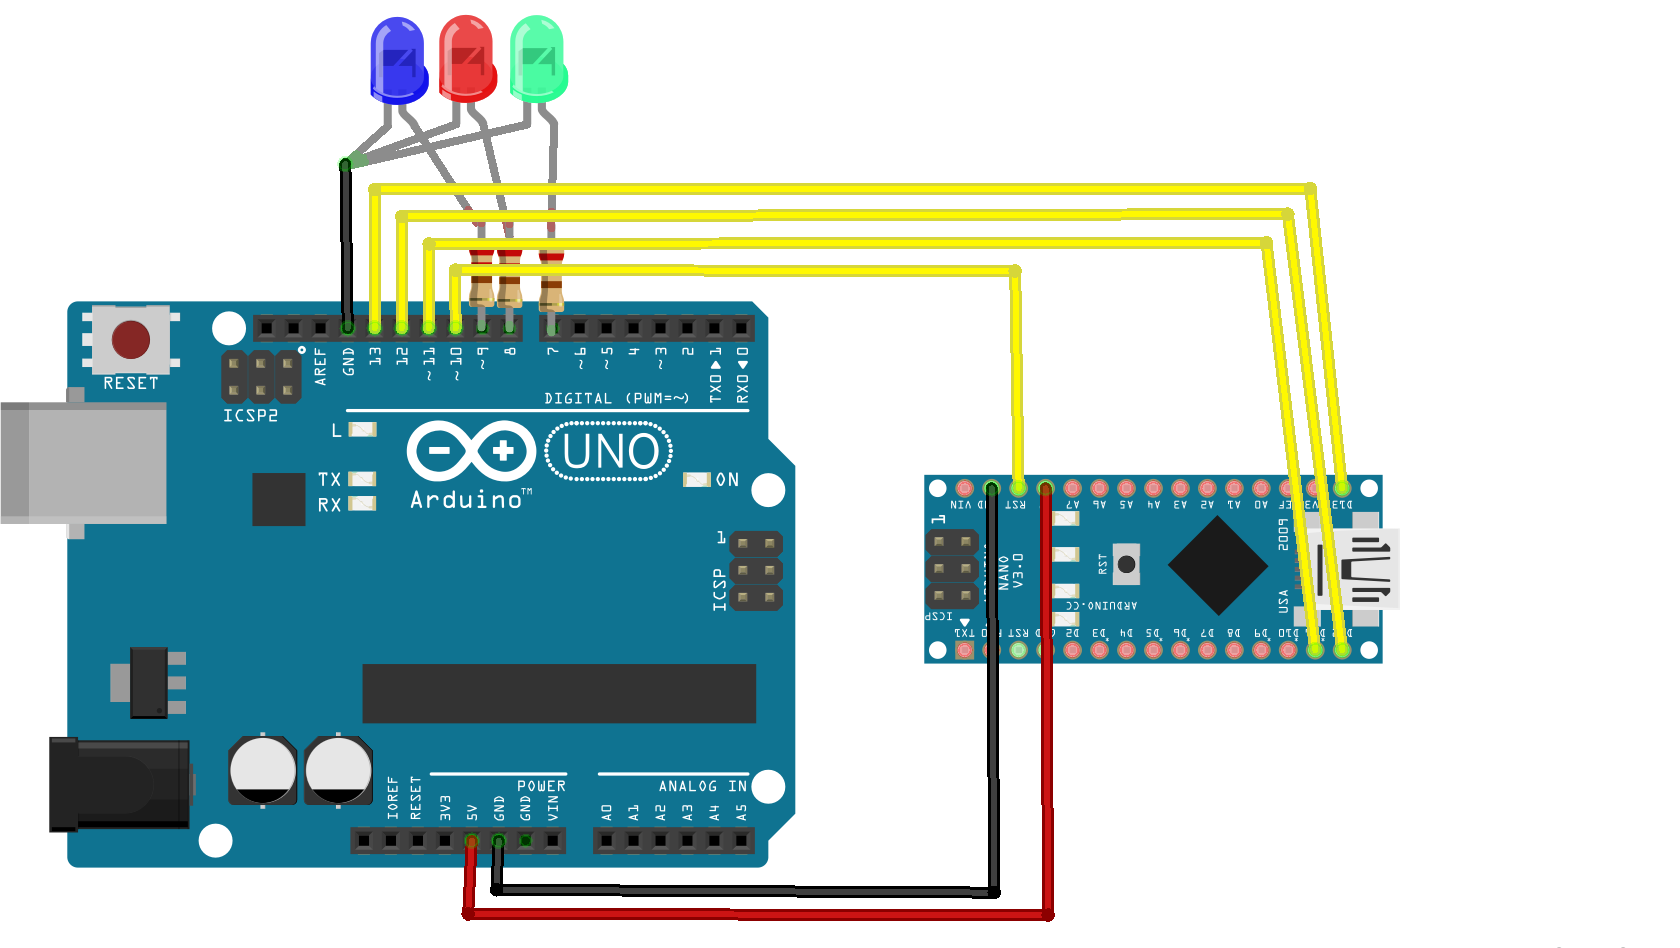
Connect the second Arduino as shown in the fritzing diagram (figure 1 Uno, figure 2 Nano) Pin 13-13, 12-12, 11-11, 10-rst, gnd-gnd, 5v-5v. The dedicated ISP breakout pins could also be used.

Burn the optiboot bootloader
To burn the bootloader, first select the to be programmed Arduino from tools->Board->Arduino (Nano in the example shown in figure 2). As of the IDE version 1.6.8 the Nano does not receive the optiboot bootloader. To burn optiboot to a Nano, select Uno from tools->Board instead. Later, when connecting the Uno via USB to your computer to program it, remember to also select Uno instead of Nano! Then select burn bootloader from Tools->Burn Bootloader. The status LED (pin 7) on the ISP Arduino should flicker when uploading.

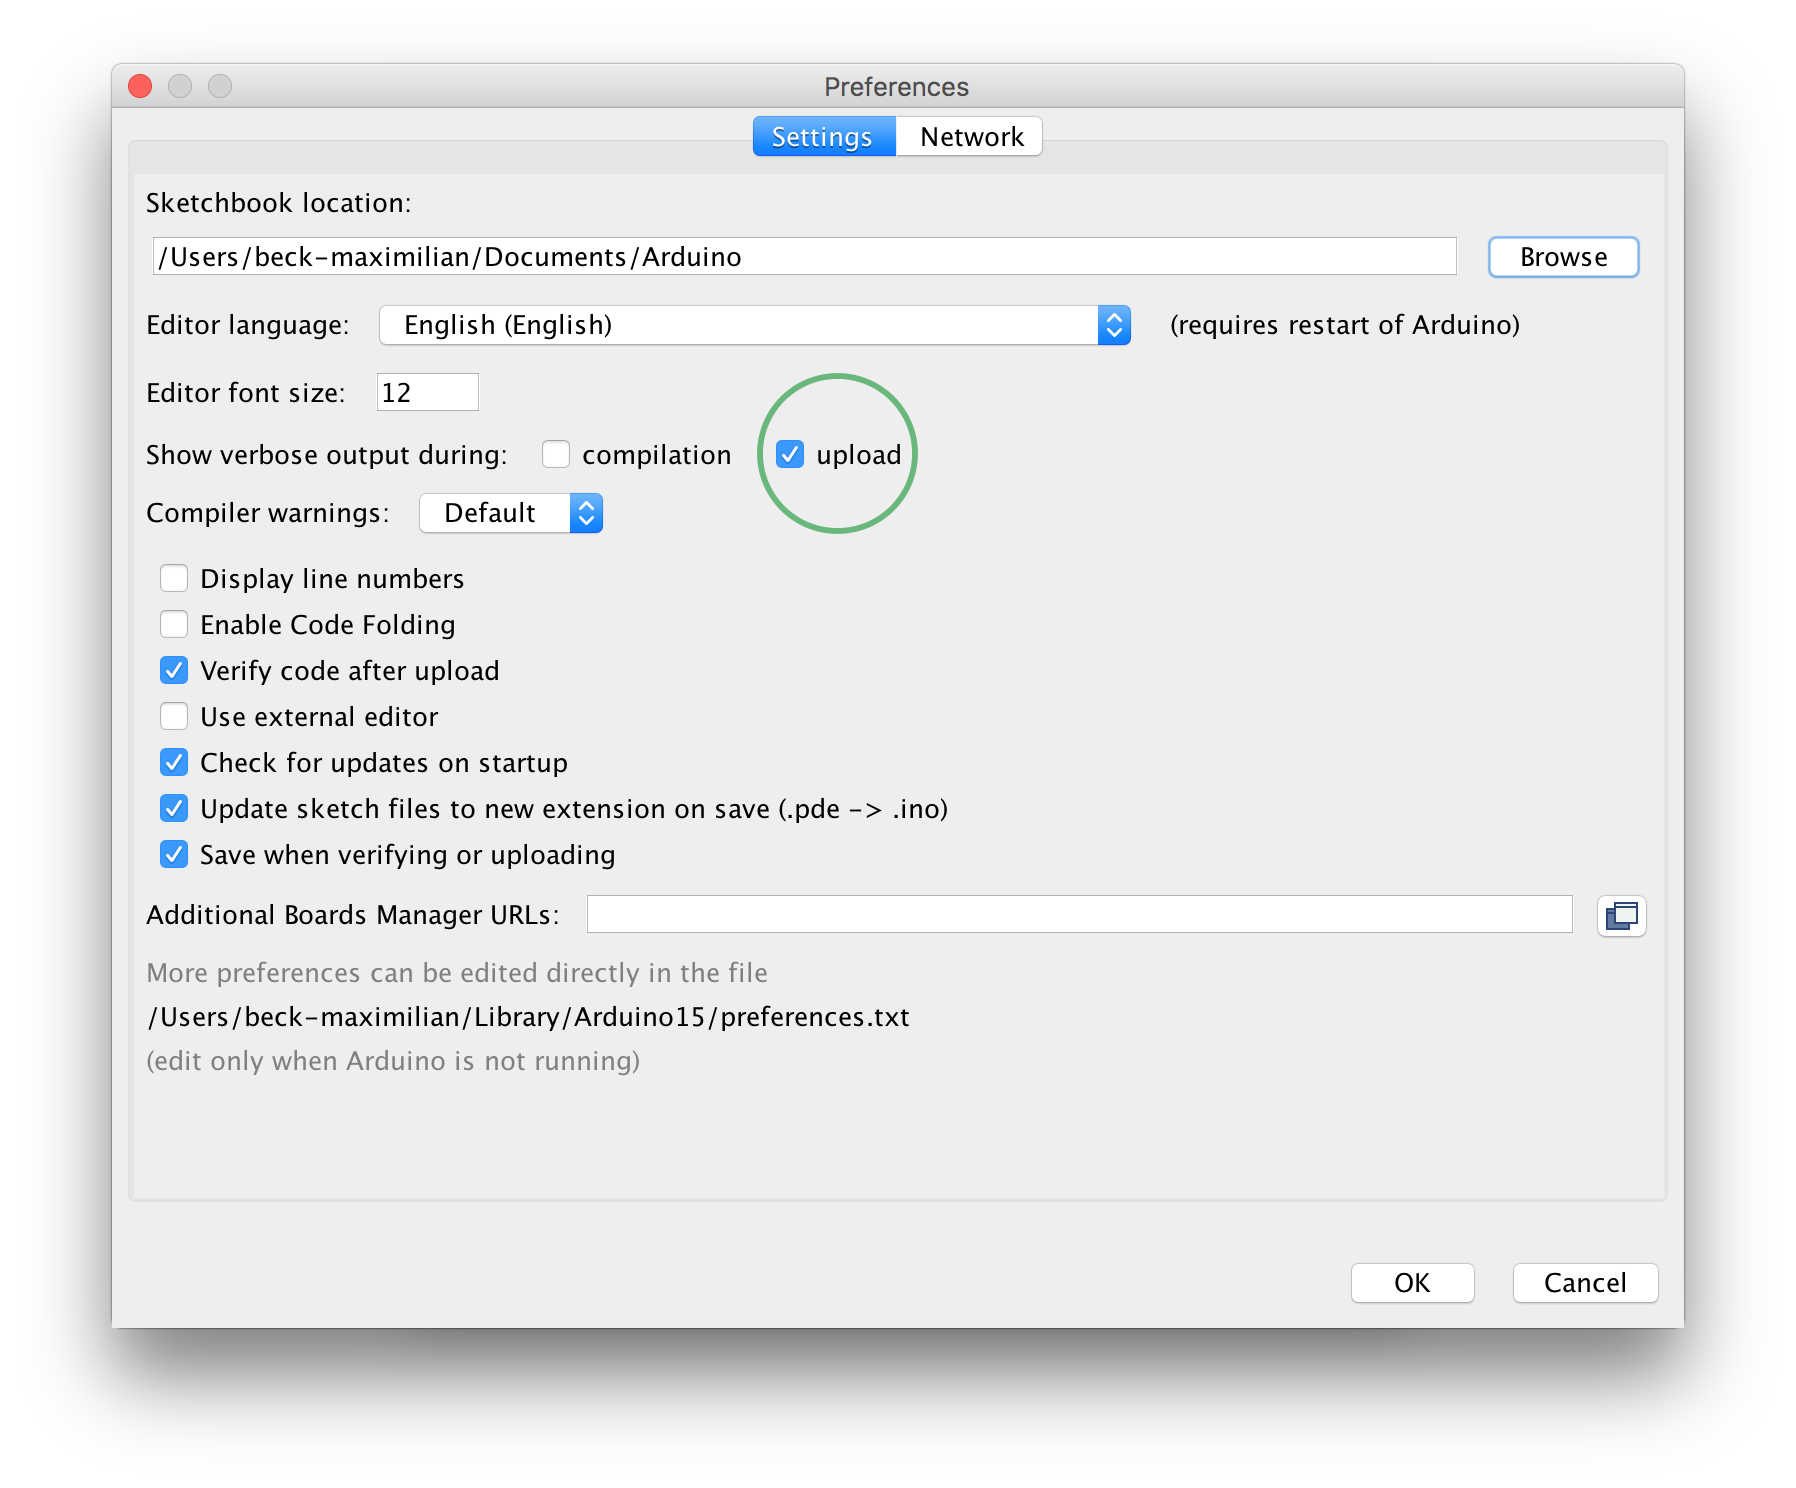
If any errors arise it is useful to activate errors reporting in the Arduino IDE settings (figure 3) for a more detailed error message. The bootloader is now on the Arduino. Connect it via USB to upload sketches.

Remove the bootloader and burn a sketch
Uploading a sketch via an ISP overrides the bootloader with the sketch. You may want to do this if you need more space for your program or want the program to start immediately. To burn a sketch select the type of the Arduino on which the program should be burned from tools->Board. Select Sketch->Upload using Programmer or ⇧+⌘+U to upload via a programmer.
← Raspberry Pi garage door controller
→ How to setup a IOTA fullnode on Ubuntu 16.04